Wednesday 13 April 2011

Model Evaluation

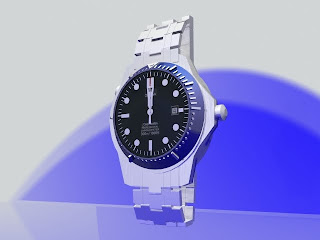
Model 1 - The Omega Seamaster


My first model The Omega Seamaster, I really like this model, I think the watch came out very similar to the real life one, the only part I would like to improve are the background of the face of the watch, I could have use a plane, instead of a cylinder, so the material can fit better. However this is my first model, so I don't really have much idea how this software work.

The watch have done the job of what I wanted to do, the reason I choose the watch in my animation are I want something that can count down the time of the animation as is playing and something important happen it will change the shape to make the scene stand out.

Model 2 - Armatlite AR-7


At the start I was thinking what kind of gun to create, and because most people are using hand gun, so I decide to do something different, to make my animation stand out, so Armatlite AR-7 is choose to do the task.

I think the shape of the gun, have cam out as i expected to be, but as I am not experience the material did not came out very good, some of the material has been stretch too much. However now I got more knowledge I know how to fix this problem by using unwrap UVW.

Model 3 - Lotus Esprit S1


The only reason I choose this car is, it can turn into a submarine. Which at the start I think the animation will look very good, if i can make it. Turn out I think I have did OK of modeling and animating this car.

Model 4 - Sackboy ver 007


I want my animation to be unique and choosing what character to use is one of the option, I have decided to use Sackboy is because he is very easy to customise.

I think my Sackboy still got room for improvement, such as adding more detail to the hand and material, but I don't want to make the file size to big, which take longer to render.

Model 5 - background building


Those building are the result of the 3d max tutorials, which I have learn a lot of skill from it, such as UVW map and day light system. Those techniques have help me a lot for my future modeling. I really like how the out come ending up like a real building.

Model 6 - MI6

Using what I have learn from the tutorials, I decided to create the MI6 building which is a challenge, because it is more complicate building and with a lot of different window and shape.
I am very please with the result of how a image can turn to a realistic 3d model.

Model 7 - The Ocean


The ocean are one of my favorite, just by using a plane, material and lighting can make a very realistic scene and I really like how the water respond when I place different object into the water.

The ocean can turn to so many different scenes, just by using different setting of light and it always came out with nice realistic effect.

Model 8 - Gun barrel

The gun barrel are simply and have a nice effect. The camera skill have also helped me for my animation is well.

I like how everything inside the gun barrel reflect and as the camera move forward, it seem like the barrel are turning at the same time.

Model 9 - Gun case


The gun case have came out very well, I like how there is a gun shape space in the middle on the box. The sponge material have came out very realistic.

Model 10 - underwater
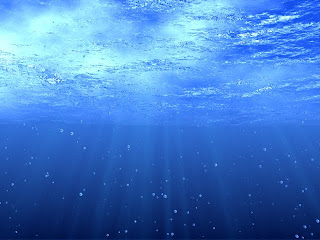
My final model in my animation are create a underwater scene, this is the first time I have used the environment settings. which has let me let learn something new.
I really like the underwater scene with the volume light effect on, but as it take too much time to render one frame, is it not a good idea to use it in my animation.
PCould is the second new effect, I have learn from the tutorial. which gave out a very nice bubbles effect for my animation as the car dropping down.

Model ? - Explosion


This is the only model I have created, but I didn't used in my animation, because I think my explosion is not very good and I have run out of time to work on the explosion. However if I have more time I can work on this model more, so I can be able to create a more realistic explosion with can work very well in my animation.

Evaluation

I think my animation have came out as I have expected. This is my first time to use a piece of 3d software, so I don't know how to use this program at the start. As I gain more knowledge, I start to know what can I do with this program and create a animation, which I think I have stuck to my storyboard, without change much of the idea.

Some parts I would like to improve in my animation are the movement of the character, I think the movement of the character are not realistic enough. It has taken me a long time and a lot of error to set up the biped I could still see some error in the character when it start to move, so I still got much more too learn when using biped.

The part I really like are when the car drop into the water and the underwater view. The scene has took some time to get everything ready, such as reactor, super spray and the water effect, and I like combining the two scene together to give out two different camera view.


Overall I think I have try my best to learn different techniques of improve my modeling skill at a short period of time. I have enjoyed every part of creating my animation, from modeling to editing. This module have gave me more idea of how the 3d animation work and to produce a good animation, you will need to spent a lot time on it.
Now I know what can I do with this program and the work that other people have made, has
made me want to try out more different tutorial, to improve my skill to make my model much more realistic.

The spy who loved......sackboy!?


This is my finish animation, I have used premiere pro to do the editing.
I have import all the scenes to premiere pro and increase the video track to 5. To start I have put scene 1 in first, so I have a idea where the video is about to stop. Then place scene 2 below scene 1. I want scene 1 to get smaller and move to the bottom right corner, then as scene 2 get smaller, scene 1 will move from the bottom to the top right, as scene 2 move to the top left and scene 3 at the bottom, To have this effect, I have go to the effect control turn on position and scale from the motion rollout, so I can now change the size and position of the scenes. For scene 3 is bit different, because I don't want the whole scene to get smaller, I just want the height of the scene get lower, so I turn off uniform scale and set a key frame so scene 3 will get smaller as it appear.

As scene 2 and 3 are ended, scene 4 will come up, before that I want to add in a black screen. However scene 1 is 30 second long, so in scene 1, effect controls turn on opacity set a key frame before the scene 3 about to stop and change the opacity to 0 at scene 3 ended.

In scene 5, just before the car jump off the jetti, I think the car is not going fast enough, so I have decide to speed up that part, by going to the effect controls, time remapping. Turn on speed and set a key frame at the point where the speed up will finish and just drag the line upward so it speed up the video. At the second part I drag the line a little bit downward, so it look like the car is going in slow motion. The I have placed scene 6 below scene 5 just when the car start to go in the water and in scene 5 and 6 I have change the value of the scale height, so it have a split screen effect.
Then I place all the scene in order and use New item, title to add the SID at the end.


For the background music, I have use 'My Patch by Jim Noir' and Bond 77 from The Spy Who Loved Me Soundtrack. I have used soundbooth to mix the two soundtrack together.

Reference:
plykshow
2008
Bond 77 (The Spy Who Loved Me Soundtrack)
http://www.youtube.com/watch?v=ZGwG21NaRSI&feature=fvst
[Internet]
[06/4/2011]

picknick21
2008
Little Big Planet Music "My Patch - Jim Noir"
http://www.youtube.com/watch?v=jSBOM32NEoo
[Internet]
[06/4/2011]

scene 9


Scene 9 is the final scene, I create zero using tube, convert to poly, select vertex and drag the middle vertex down. 7 is made using line tool, convert to poly and use extrude to make the number 3d.

Create two planes with black colour for the wall and floor, apply a target spot and camera, then target on the 007. Turn on auto key and in frame 75 pan the camera from left to the right.

I then try to move sackboy up to the middle, but it doesn't allow me to, becuase of the biped. Instead of draging the sackboy up, I decided to drag the word and background down.
Turn on auto key and select everything instead of sackboy and move everything down. Select camera at frame 53 the camera start to zoom in.


To make sackboy wave, I select biped and go to the motion panel. At the keyframing tools rollout, I have select anchor right arm and just drag his arm up and down.

scene 8


Scene 8 start with looking inside the gun barrel and zoom in, then sackboy walk past and look at the gun barrel, as the light dim.

First same as scene 4, select the biped, go to motion panel. Biped rollout, turn on footstep mode, at the footstep creation rollout, select walk and create multiple footsteps. This time I have use 11 step, and i need sackboy to turn at face the camera, so at the top viewport I click on step 8, use the rotate tool to make sackboy step in different angle and use the move tool to move it in place. Then I do the same to step 9 to 11.

As i have already created the camera and omni light, I only need to adjust the value of the multiplier for the light and use auto key to adjust how much the camera are going to zoom in.

Then I apply a target spot, using auto key to create keyframe, so the light can follow sackboy as he walk, and when sackboy stop, I just turn the value of the multiplier down, to dim the light.

Scene 7


Scene 7 is more base on the camera movment, I want the camera to start from far away, then move in front to back of sackboy.

So I place sackboy on top of the MI6 building and place the gun in his hand. Create a target camera in the viewport and focus on sackboy. Turn on auto key, at frame 70 move the camera upward, then pan the camera to right and zoom in all the way, so is behide sackboy and zoom in at the end.

Scene 6


In scene 6, I want to have a underwater view as the car droping into the sea.
As I have already created the underwater scene before, so all I need to do is turn on auto key and drag the car down using the move tool.


Next part is to use the target camera to zoom into the car wheel, turn on set key frame, go to frame 13 and move the wheel inside the car, and set key, then at frame 25 rotate and move the wheel upward and set key to finish off.
Then move the plane forward to close of the gap.


Final part is to get the hydrowings to come out and the car move forward. In the same camera position, turn on auto key frame and drag the hydrowings out the car, then I link the hydrowings to the car. So when i move the car the hydrowings move with the car at the same time.

Scene 5


In scene 5, I want the car to go forware and drop into the sea.

First I need to create a jetti for the car to jump off, so I create a box and assign a wood material on to the box.


Right click on the menu bar and select reator, to bring the reator menu up.


At the reator menu select create rigid body collection and creat it in to the viewport. Go modifier panel and in the RB Collection properties rollout, click add and add the car and the jetti.
Select Utilities, reactor, in the about rollout choose solver for havok 1. Go to Havok 1 world rollout, gravity of x is 300 and have z to -100. This pull the car forward 300 and down 100. Create preview in window, but my animation can't be preview, because the car have too many vertices. So I have to create animation to see how it work.


I want to have some splash, as the car drop in the water, to do this I select Geometry and from the drop down list choose particle systems, and super spray. Create the super spray at the top viewport, so it will spray upward.
At the modifier panel, basic parameters rollout, particle formation, change the first spread to 90 deg and the second spread to 83 deg. Viewport display mesh. Particle motion speed to 20.
Particle timing, emit start at frame 53 and stop at frame 63 with life 7. Particle size 2.381.
Create a new material, I have try to use water and glass material with blue colour high specular level and I think glass material came out with better effect, so I have choose to use glass for the splash material.


Create a target camera and target just about the end of the jetti. Turn on auto key and as the car jump pan the camer at the right.

Reference:
1926woodflooring
2011
QuickStep 800 Lagune Vintage Oak Dark Varnished Shipdeck UR1035 Flooring
http://www.1926woodflooring.co.uk/acatalog/info_Q_UR1035.html
[Internet]
[05/4/2011]

Scene 4


In scene 4, I want sackboy to walk pass with the Lotus Esprit S1 behide and the spot light is flashing at the same time.
First I need sackboy to walk, so with the biped inside sackboy, go to motion panel, in the biped rollout, choose footstep mode. At the footstep creation rollout, select walk and create multiple footsteps. I have use 26 steps, so sackboy walk to the end of the car, then just turn off footstep mode.

Create a target spot, turn on auto key and as sackboy move, the light will slowly follow him. To do the flashing effect, I just turning the multiplier value at the the intensity/color/attenuation rollout.

Then create a target camera focus in the middle of the scene.

Scene 3


In scene 3 the light of the car turn on and the car drive off.

Create a target camera and target it to the car using link, then turn on auto key. Start the camera at the left side and pan the camera to the right, so is at the front of the car and pause for a few second, then pan the camera back to the left.

Inside the few second pause of the camera, I want the light to turn on, so I create two target spot and place it in front of the car light. Turn on auto key and at the the intensity/color/attenuation rollout, change the multiplier to 0 at frame 20 and turn the multiplier up to 30 at frame 21.

In auto key, select the car and the target spot, start at frame 24 and in frame 84 move the car forward, because the camera is link to the car, the camera will follow the car as it move.

Scene 2


In scene 2 the camera will pan from right to left and focus on the gun at the same time.

Create a target camera and target to the gun, turn on auto key, go to frame 125 and pan the camera to the left. As the camera is moving, I want the box to close, so in auto key and rotate the lid so it close the box.
Then apply a target spot aiming at the gun to finish off, so as the camera move the scene get darker.

box

To begin the second scene, I want to create a container for the gun, so I create a box, convert to poly and select edge. Turn on swiftloop and apply vertical and horizontal loops to the top of the box. Then I place the gun on top of the gun and use the line tool to draw around the gun to get the outline, move the gun away. Attach the line to the box and in the modifier panel select polygon. In the edit geometry rollout, turn on create, and select the vertex I want to join together to join the line and the box together. Select vertex and use the move tool to drag each vertex back to the same level, then turn on extrude select the gun space in the box and extrude the gun faces down.


Change the material for the outside of the box to 1, just the middle top part of the box to 2, the gun face to 3 and the outline of the top to 4. Open the material editor, use multi/sub -object. Material 1 is standard white material with little bit of reflection, raytrace.
Material 2 I have use a sponge bitmap with 56 specular level and 34 glossiness. Then apply the bitmap to bump and set to high value. Material 3 and 4 it just a standard material with different colour and specular.

Then I copy and paste the box again, delete the top of the top. select edge and use bridge to close the top, change the height of the box and place it next to the body of the box. Go to Hierarchy and change the pivot point so the lid will close the box, when I rotate it.

Reference:
Aquaholicman
2009
How to make a DIY sponge filter
http://livebearers.org/modules/newbb/viewtopic.php?viewmode=compact&topic_id=78&forum=15
[Internet]
[05/4/2011]

Scene 1


I want the first scene to begin with the watch far away and slowly zoom in as the time go. The watch itself are moving every second and light up when the scene are dark.

To do the time of the watch moving, I have use auto key for this task, because PAL is every 25 frame a second. I have move the second hand to set a key frame every 25 frame and I have decided to go up to 30 second which is 750 frame. When the watch reach to 15 second, the scene will get dark, so I want to have a new material that glow in the dark. In the material editor, I have use Arch & Design material and in the self illumination (glow) rollout, turn on self illumination (glow) and use white for the colour, and assign the material to a group of cylinder that i have create earlier and name it light1. To make the light1 only appear at frame 375, I have use the visibility track, click on light1 and open dope sheet. Inside the dope sheet, click tracks and select add visibility track. Go to the object and select the + icon of light1, click on the visibility line, select controller, assign and use on/off. At the visibility track, click on add keys and put a key frame before 0 frame and another key frame at 375 frame, so in between 0 to 375 frame light1 become invisibility.


Then I draw a line in the top viewport, place the line infront of the watch and create free camera at the front viewport. In the motion panel, assign controller, position: position to path constraint and add the line to path. Now I want the camera to zoom in, to do this I turn on auto key again. I drag the timeline to 375 and move the camera forward and this create the zoom in effect.

Next I want to dim the light as the camera zooming in to the watch. Create a target spot, aim the light directly to the watch face. Turn on auto key and at 376 frame, drag and move the light to the side of the watch.

Sunday 10 April 2011

Swot Analysis

Strengths

It’s my first time to using a piece of 3D modeling software, and I have learnt how to use 3d max in a short period of time. It has taken time but now I know how to use most of the functions in 3D max.

I have enjoy creating the models, although it take me a long time to create them, but is good to see the models when it’s finish.

Applying material used to be my weakness, but after learning different tutorials on the internet I have become better on applying different type of material to the models.

Weaknesses

My weakness is keeping the blog up to date, I have found myself just keep making the models and forget to print screen images for the blog. Also taken me a long time to written the posts.

I have found 3Dmax quite difficult at the start, because I have never using a piece of 3D modeling software. The models that I create at the beginning are very basic with different kind of problems, such as material.

Opportunities

By learning in the lessons and online tutorials, I have now got a good knowledge of 3D modeling. When I build the models, I has different kind of error occur, but due to fixing and more creating of different kind of models, I can now go back and recreate the models I done before to a better standard and will take less time.

Threats

The biggest threats are the rendering. Rendering can take up to 10 min, 3 hours or higher, and will slow the computer down. So I can’t do other work on the computer, because of the rendering. If something I want to change after the rendering, you will, have to render everything thing again.

Comment on colleagues work

Posted on :

I like the different type of technique used in your animation, and the best part is glass shattering.


Posted on The water has gave out a good realistic affect, making the bitmap look like a 3d model.

Monday 4 April 2011

Creating part for the transformation

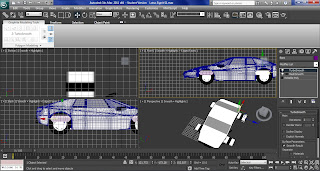
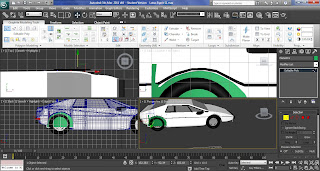
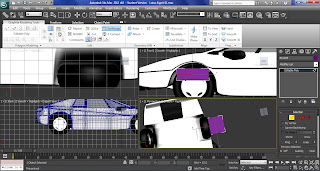
In 'The spy who loved me' the Lotus Esprit S1 has transform to a submarine, so I create extra part for the model.
First I create a plane in the front viewport, change to the size I want and have 1 length segs and 4 width segs, convert to editable poly.
In the modify panel, select vertex and change the shape of the plane. Open material editor and apply the same colour as the body of the car, copy and paste for the other side and use mirror to have the plane facing the right way.


Next I need to create the hydrowings, so I have create a box in the front viewport, with 1 length and width segs, convert to editable poly, set material ID to 1 and use swiftloop to add an horizontal loops at the middle and two more at the top set the material ID to 2, select vertex and drag the vertex in the middle out, then apply meshsmooth and turbosmooth.

Under water

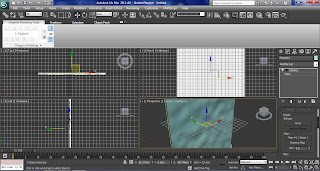
Create a plane at the top viewport with length to 1000, width to 500, and have segs for length and width to 200.
Select the modify panel and choose displace from the modifier list, go to displacement rollout, strength to 17 and image, map to noise.


Open material editor, drag and drop the noise map to the slot and select instance, at the parameters, noise parameters, have noise type to turbulence, level to 10 and size to 300.
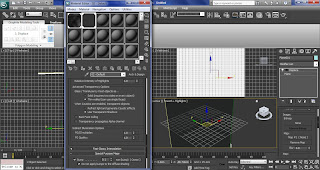
Click on the second material slot, get material and select Arch & Design from the list, Select template from the drop-down list, choose Water, Reflective Surface, with transparency to 1.0.Go to advanced trasparency option, glass / translucency treat objects as Thin-walled. At the special purpose maps, have largest to 100, smallest to 1, quantity to 20 and steepness to 5.


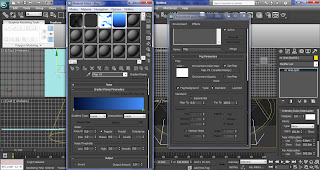
Open environment settings, background, turn on use map, in environment map choose gradient ramp. Then open material editor, drag and drop the Gradient Ramp map to a slot, select instance, at coordinates rollout, mapping to spherical environment, gradient ramp parameters rollout, flag1 have dark blue colour and flag to have light blue colour, noise amount to 1, type fractal, size to 2 and levels to 10 and output amount to 3.

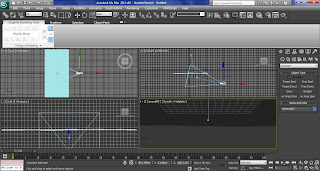
Create a target camera in the top viewport and a mr area spot in the front viewport, go to the modify panel, general parameters, turn off shadow, Intensity/Color/Attenuation, multiplier to 2.


Open environment settings, go to the atmosphere settings and click add fog, turn on use map and choose gradient ramp. Then open material editor, drag and drop the gradient ramp map, in mapping choose screen, angle w to 90, flag dark blue to light blue and output amount 1.5.
Select camera and go to the modifier panel, environment ranges, tuen on show, near range to 200 and far range to 810.

At the environment settings, atmosphere add volume light and pick the area spot, have density to 7.
Select area spot, modify panel, Intensity/Color/Attenuation, colour to blue, use far attenuation, start at 430, end at 650, advanced effects, projector map, noise. Drag and drop the noise map to a material slot, coordinates, source choose explicit map channel. In noise parameters, choose turbulence for noise type, levels to 10, 0.05 for size and 0.35 for low.


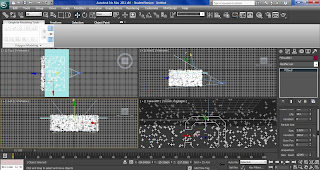
To add bubbles to the scene, I have use PCloud, creat PCloud in the left viewport, go to modify panel and in basic parameters, display icon, rad/len to 230, width to 700, height to 480. In particle generation, particle quantity, use total to 1000, particle timing, emit start to -10, particle size to 1.5, variation to 100 and 0 for grow and fade. Choose sphere for standard particles.

Open material get material and choose Arch & Design from the list, select glass from the termplate fromthe drop down list and assign the material to the PCloud.


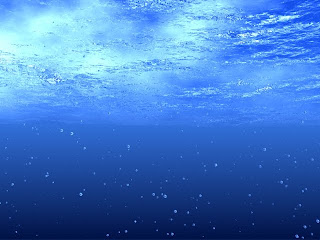
The rendering has taking a long time for just 1 scene, so I decided to take off the volume light effect to increase the rendering speed and the out come is shown below.

Reference:
polygonblog
2011
3D Underwater Scene
http://www.polygonblog.com/3d-underwater-scene
[Internet]
[04/4/2011]

Gun barrel

I need to create a gun barrel for my animation, first I draw a line in the top viewport, and change the length to 2000, then create a tube with radius1 to 54, radius2 to 50 and height to -2000, have the height segments 1 and 28 at the sides.
Then convert it to editable poly, select edge tool and click on the vertical edge, loop and ring select all of them, then chamfer them to 0.75. Select polygon, highlight all the faces of the tube and change the material ID to 1.


Select all the large faces that are inside the tube and use extrude to extrude the faces out about 0.8, then scale the faces, so is parallel and set their materiel ID to 2


Set up a free camera inside the tube, go to the motion panel, assign controller, position: position to path constraint and add the line to path.


Put a omni light at the end of the tube, go to the modify panel, turn on ray traced shadows, inverse decay, turn on the use, show for near and far attenuation. For near attenuation end at 52cm and far attenuation start at 52cm, end at 500cm and diffuse only.


Open material editor and select multi/sub-object, set number to 2, the first ID is black, second ID add a noise bump map with 1 value and raytrace to reflection with 40%, change the bump map effect to 0.1, then assign the material on the tube.

Go to the modifier panel and use the edge tool, select all the length edge, at the edit edges rollout, use connect and enter 80 to segments.


From the modifier list add twist to the tube and angle to -540, then add mesh smooth and smooth by group.


Reference:

cr8vcow
2009
Explosion Tutorial
http://www.viddler.com/explore/cr8vcow/videos/11/160/
[Internet]
[4/4/2011]