Wednesday 13 April 2011

Model Evaluation

Model 1 - The Omega Seamaster


My first model The Omega Seamaster, I really like this model, I think the watch came out very similar to the real life one, the only part I would like to improve are the background of the face of the watch, I could have use a plane, instead of a cylinder, so the material can fit better. However this is my first model, so I don't really have much idea how this software work.

The watch have done the job of what I wanted to do, the reason I choose the watch in my animation are I want something that can count down the time of the animation as is playing and something important happen it will change the shape to make the scene stand out.

Model 2 - Armatlite AR-7


At the start I was thinking what kind of gun to create, and because most people are using hand gun, so I decide to do something different, to make my animation stand out, so Armatlite AR-7 is choose to do the task.

I think the shape of the gun, have cam out as i expected to be, but as I am not experience the material did not came out very good, some of the material has been stretch too much. However now I got more knowledge I know how to fix this problem by using unwrap UVW.

Model 3 - Lotus Esprit S1


The only reason I choose this car is, it can turn into a submarine. Which at the start I think the animation will look very good, if i can make it. Turn out I think I have did OK of modeling and animating this car.

Model 4 - Sackboy ver 007


I want my animation to be unique and choosing what character to use is one of the option, I have decided to use Sackboy is because he is very easy to customise.

I think my Sackboy still got room for improvement, such as adding more detail to the hand and material, but I don't want to make the file size to big, which take longer to render.

Model 5 - background building


Those building are the result of the 3d max tutorials, which I have learn a lot of skill from it, such as UVW map and day light system. Those techniques have help me a lot for my future modeling. I really like how the out come ending up like a real building.

Model 6 - MI6

Using what I have learn from the tutorials, I decided to create the MI6 building which is a challenge, because it is more complicate building and with a lot of different window and shape.
I am very please with the result of how a image can turn to a realistic 3d model.

Model 7 - The Ocean


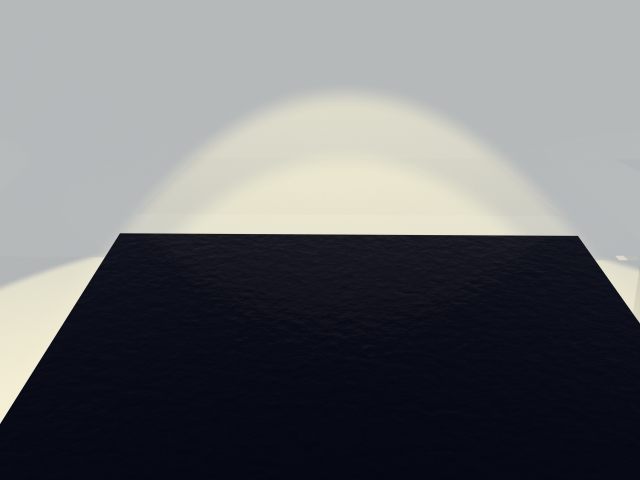
The ocean are one of my favorite, just by using a plane, material and lighting can make a very realistic scene and I really like how the water respond when I place different object into the water.

The ocean can turn to so many different scenes, just by using different setting of light and it always came out with nice realistic effect.

Model 8 - Gun barrel

The gun barrel are simply and have a nice effect. The camera skill have also helped me for my animation is well.

I like how everything inside the gun barrel reflect and as the camera move forward, it seem like the barrel are turning at the same time.

Model 9 - Gun case


The gun case have came out very well, I like how there is a gun shape space in the middle on the box. The sponge material have came out very realistic.

Model 10 - underwater

My final model in my animation are create a underwater scene, this is the first time I have used the environment settings. which has let me let learn something new.
I really like the underwater scene with the volume light effect on, but as it take too much time to render one frame, is it not a good idea to use it in my animation.
PCould is the second new effect, I have learn from the tutorial. which gave out a very nice bubbles effect for my animation as the car dropping down.

Model ? - Explosion


This is the only model I have created, but I didn't used in my animation, because I think my explosion is not very good and I have run out of time to work on the explosion. However if I have more time I can work on this model more, so I can be able to create a more realistic explosion with can work very well in my animation.

Evaluation

I think my animation have came out as I have expected. This is my first time to use a piece of 3d software, so I don't know how to use this program at the start. As I gain more knowledge, I start to know what can I do with this program and create a animation, which I think I have stuck to my storyboard, without change much of the idea.

Some parts I would like to improve in my animation are the movement of the character, I think the movement of the character are not realistic enough. It has taken me a long time and a lot of error to set up the biped I could still see some error in the character when it start to move, so I still got much more too learn when using biped.

The part I really like are when the car drop into the water and the underwater view. The scene has took some time to get everything ready, such as reactor, super spray and the water effect, and I like combining the two scene together to give out two different camera view.


Overall I think I have try my best to learn different techniques of improve my modeling skill at a short period of time. I have enjoyed every part of creating my animation, from modeling to editing. This module have gave me more idea of how the 3d animation work and to produce a good animation, you will need to spent a lot time on it.
Now I know what can I do with this program and the work that other people have made, has
made me want to try out more different tutorial, to improve my skill to make my model much more realistic.

The spy who loved......sackboy!?


This is my finish animation, I have used premiere pro to do the editing.
I have import all the scenes to premiere pro and increase the video track to 5. To start I have put scene 1 in first, so I have a idea where the video is about to stop. Then place scene 2 below scene 1. I want scene 1 to get smaller and move to the bottom right corner, then as scene 2 get smaller, scene 1 will move from the bottom to the top right, as scene 2 move to the top left and scene 3 at the bottom, To have this effect, I have go to the effect control turn on position and scale from the motion rollout, so I can now change the size and position of the scenes. For scene 3 is bit different, because I don't want the whole scene to get smaller, I just want the height of the scene get lower, so I turn off uniform scale and set a key frame so scene 3 will get smaller as it appear.

As scene 2 and 3 are ended, scene 4 will come up, before that I want to add in a black screen. However scene 1 is 30 second long, so in scene 1, effect controls turn on opacity set a key frame before the scene 3 about to stop and change the opacity to 0 at scene 3 ended.

In scene 5, just before the car jump off the jetti, I think the car is not going fast enough, so I have decide to speed up that part, by going to the effect controls, time remapping. Turn on speed and set a key frame at the point where the speed up will finish and just drag the line upward so it speed up the video. At the second part I drag the line a little bit downward, so it look like the car is going in slow motion. The I have placed scene 6 below scene 5 just when the car start to go in the water and in scene 5 and 6 I have change the value of the scale height, so it have a split screen effect.
Then I place all the scene in order and use New item, title to add the SID at the end.


For the background music, I have use 'My Patch by Jim Noir' and Bond 77 from The Spy Who Loved Me Soundtrack. I have used soundbooth to mix the two soundtrack together.

Reference:
plykshow
2008
Bond 77 (The Spy Who Loved Me Soundtrack)
http://www.youtube.com/watch?v=ZGwG21NaRSI&feature=fvst
[Internet]
[06/4/2011]

picknick21
2008
Little Big Planet Music "My Patch - Jim Noir"
http://www.youtube.com/watch?v=jSBOM32NEoo
[Internet]
[06/4/2011]

scene 9


Scene 9 is the final scene, I create zero using tube, convert to poly, select vertex and drag the middle vertex down. 7 is made using line tool, convert to poly and use extrude to make the number 3d.

Create two planes with black colour for the wall and floor, apply a target spot and camera, then target on the 007. Turn on auto key and in frame 75 pan the camera from left to the right.

I then try to move sackboy up to the middle, but it doesn't allow me to, becuase of the biped. Instead of draging the sackboy up, I decided to drag the word and background down.
Turn on auto key and select everything instead of sackboy and move everything down. Select camera at frame 53 the camera start to zoom in.


To make sackboy wave, I select biped and go to the motion panel. At the keyframing tools rollout, I have select anchor right arm and just drag his arm up and down.

scene 8


Scene 8 start with looking inside the gun barrel and zoom in, then sackboy walk past and look at the gun barrel, as the light dim.

First same as scene 4, select the biped, go to motion panel. Biped rollout, turn on footstep mode, at the footstep creation rollout, select walk and create multiple footsteps. This time I have use 11 step, and i need sackboy to turn at face the camera, so at the top viewport I click on step 8, use the rotate tool to make sackboy step in different angle and use the move tool to move it in place. Then I do the same to step 9 to 11.

As i have already created the camera and omni light, I only need to adjust the value of the multiplier for the light and use auto key to adjust how much the camera are going to zoom in.

Then I apply a target spot, using auto key to create keyframe, so the light can follow sackboy as he walk, and when sackboy stop, I just turn the value of the multiplier down, to dim the light.

Scene 7


Scene 7 is more base on the camera movment, I want the camera to start from far away, then move in front to back of sackboy.

So I place sackboy on top of the MI6 building and place the gun in his hand. Create a target camera in the viewport and focus on sackboy. Turn on auto key, at frame 70 move the camera upward, then pan the camera to right and zoom in all the way, so is behide sackboy and zoom in at the end.

Scene 6


In scene 6, I want to have a underwater view as the car droping into the sea.
As I have already created the underwater scene before, so all I need to do is turn on auto key and drag the car down using the move tool.


Next part is to use the target camera to zoom into the car wheel, turn on set key frame, go to frame 13 and move the wheel inside the car, and set key, then at frame 25 rotate and move the wheel upward and set key to finish off.
Then move the plane forward to close of the gap.


Final part is to get the hydrowings to come out and the car move forward. In the same camera position, turn on auto key frame and drag the hydrowings out the car, then I link the hydrowings to the car. So when i move the car the hydrowings move with the car at the same time.